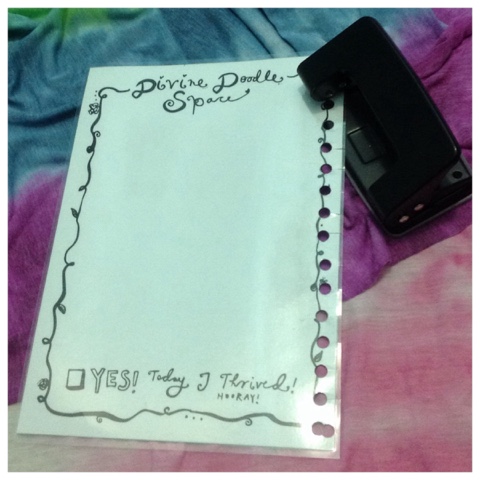
I was asked by the amazing LEONIE DAWSON to write a tutorial on how I used the To Do List notepaper to create a laminated dashboard, that fits into the 2016 Shining Year Planner. The dashboard is removable and can be inserted anywhere throughout the planner so you can use it all year long.
THINGS YOU WILL NEED
One To Do List Page
A Laminating Machine ( I used a A4 size laminator)
Laminating Pouches
A Hole Punch
Paper Cutter or Scissors
Binding Template (optional)
Pencil
STEP 1
Place to do list page into the laminating pouch and feed through your laminator.
STEP 2
Using a paper cutter or scissors, trim off the excees laminate leaving a small edge around the to do list page.
STEP 3
Place your binding template over to do list page and mark holes with a pencil. ( I used an old folder cover) otherwise line up your laminated to do list page with the binding of the planner and place a pencil mark so you know where to punch your holes.
STEP 4
Carefully punch your holes in your laminated to do list page. Using your scissors cut from the egde of the page into the punched holes. This will allow you to easily insert and remove your laminated dashboard anywhere in your planner.
NOTE : Before you trim your laminated dashboard (step 2) on the opposite edge to where you punched your binding holes, leave a tab at the top. The laminated dashboard can then become a bookmark for wherever you are in your 2016 SHINING PLANNER!!!!!
Thanks so much for reading my post and to quote Leonie, "may 2016 be your most SHINING YEAR EVER"
If you havent already please check out Leonie Dawson's Shining Academy to find out more visit www.leoniedawson.com
Sarah
Rainbow Gecko Gallery


